Dan got his start on YouTube in August of 2011, recording gameplay videos as a fun hobby while attending school for video production. Joining the vidIQ team in 2020 allowed Dan to combine his hobby and professional talents to now help others grow their own YouTube channels.
How to Live Stream on YouTube with Streamlabs OBS - Beginner's Setup Guide
Going live on YouTube these days isn't as complicated as you would think. In this post, we'll discuss a few different things you need to know to make your live stream as professional as possible including:
- The hardware needed to live stream
- The software/encoders you need to live stream
- How to set up your live stream broadcast on YouTube
I’m a gamer so I like to give things a gaming focus, so I am going to be using video game live streaming as an example. But all of the following advice will apply to any type of YouTube channel looking to learn how to broadcast live.
How to Live Stream on YouTube: The Hardware You’ll Need
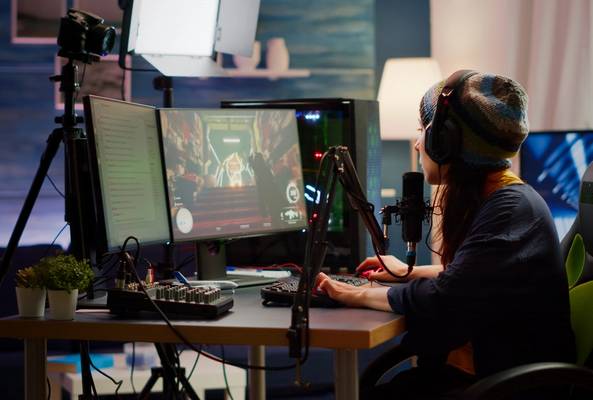
Streaming these days is a lot easier when it comes to the hardware you're going to need. I'll show you what I use to stream from my own computer when I play games, and hopefully, that will give you a good baseline for a guide.
First off, let’s talk about the Internet. This is going to be the biggest bottleneck you're going to face while live streaming. The Internet is such an important element in the mix because, in some areas of the world, you just can't control what kind of speed you're going to get when you sign up for your Internet plan.
The best speed I can recommend is no less than five megabits per second upload when you're trying to stream on YouTube. Personally, I have 10 megabits per second for my upload speed, and it allows me to push a better quality live stream. 5 is just my personal recommendation because I think any less, and you're going to struggle when it comes to quality.
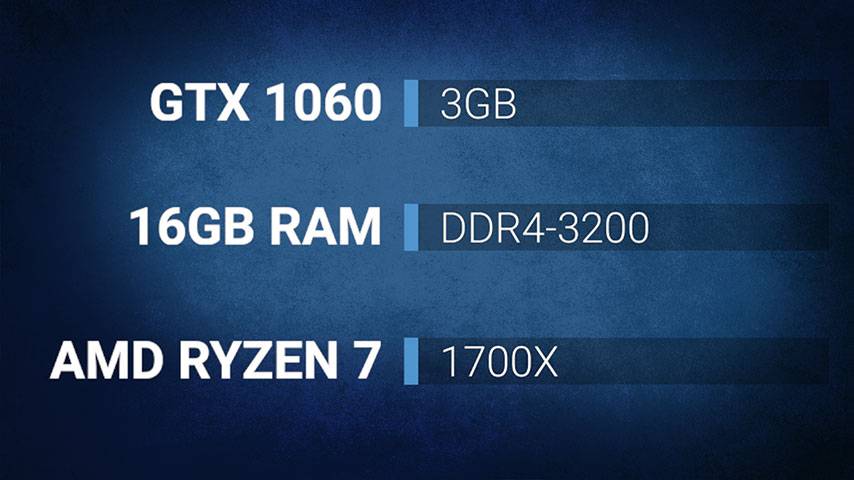
Now for the type of computer you need to play a game, and live stream it at the same time, I have a GTX 1060, three gigabytes, with 16 gigabytes of RAM. I’m also using an older AMD Ryzen 7 processor. These items allow me to stream with 10 megabits per second upload. I can play Minecraft at 1080p with 30 frames a second, or I can play it at 720p with 60 frames a second.
If I try to push it any higher than that, the game performance and stream quality drops. The bottom line is that top-quality hardware is great, but with software advancing so much, not using the very latest state-of-the-art computer doesn't have to limit you.
Software: Encoding a Live Stream Broadcast on YouTube
When we talk about software for live streaming, we're actually talking about encoders. Anything you've used to live stream is an encoder, but I’m going to focus on Streamlabs OBS for this tutorial.
There are a lot of encoders out there, YouTube actually has a list of recommendations, some free, some not. Thanks to how powerful these encoders have become, using something like Streamlabs OBS allows you to stream a game on your computer at a much higher quality than ever before.
Before we dive in head first, I will warn you this set-up can get very technical, and I'm going to cover it very briefly, in the most basic way possible, just to get you started. All the things I'm showing you are going to depend on you at the end of the day. You need to run test streams on your own channel, and maybe even get feedback from viewers on different testing streams you try.
Let’s go through the Streamlabs OBS set up. First, you’ll need to connect to your YouTube channel by logging in - just follow all the prompts!
- Next, go to ‘Sources’ and click ‘Add’
- Let’s say you want to add a game capture, just click ‘game capture’, then ‘Add Source’
- The software will now search for a game on your system to capture
- If it has trouble doing this, click on the drop-down menu to capture a specific window
- Adjust the screen size so it fits the window
Now let's tackle some of the more technical aspects of live streaming on Streamlabs OBS. If we visit the output section, we can choose our encoder. In the example I use in the video (above), it's set to software x264. This is going to use my CPU to do all of my encoding for me, but if you want, you can change it to NVENC or the new version of that.
This uses your graphics card to encode. Depending on what you're doing, the game you're playing, or the type of broadcast you're doing.
Personally, I prefer using NVENC when I'm streaming, so I'm going to go ahead and select that. And I'm going to do a bit rate of about 5,000 because I already know my system, and I know it can handle that. Like I said before, this is going to take testing on your part, so maybe 2,500 is a good place for you to start, and you can go from there.
Now on to the video tab. You'll notice the base canvas resolution is 1920 x 1080. I would leave it at that. In theory, I should probably raise the base canvas resolution, but that's okay. I just got my 4K monitor, and I don't feel like resizing all of the different elements that I have on my normal live stream, so I'm going to leave it at 1080.
But the output scale is what's going to directly impact your broadcast, and I'm broadcasting at 720. These days, when people watch live streams, they watch them on a variety of devices, including phones and laptops. So with this screen being a little more compact, and squashed down to 720, it is probably going to give you a higher quality live stream at little to no impact on the viewer.
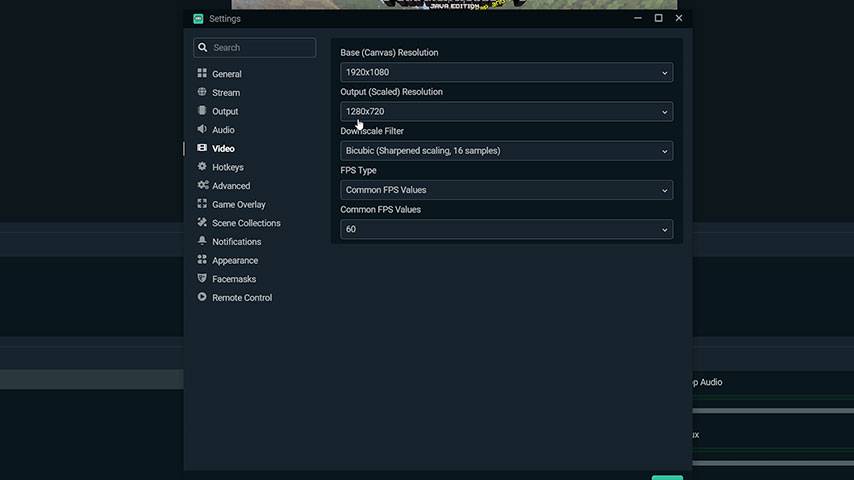
If you lower that resolution, it's going to get you closer to being able to stream at 60 frames a second, which will impact everybody who's watching, regardless if it's a nice, big TV or a phone. So because I like high frame rates when I'm playing games, I'm going to leave it at 720, but if you have a super awesome computer, maybe you can try 1080 at 60 frames. That's all up to you.
The last recommended setting is under ‘Advanced’. You can scroll down and find “dynamically change bitrate when dropping frames while streaming”.
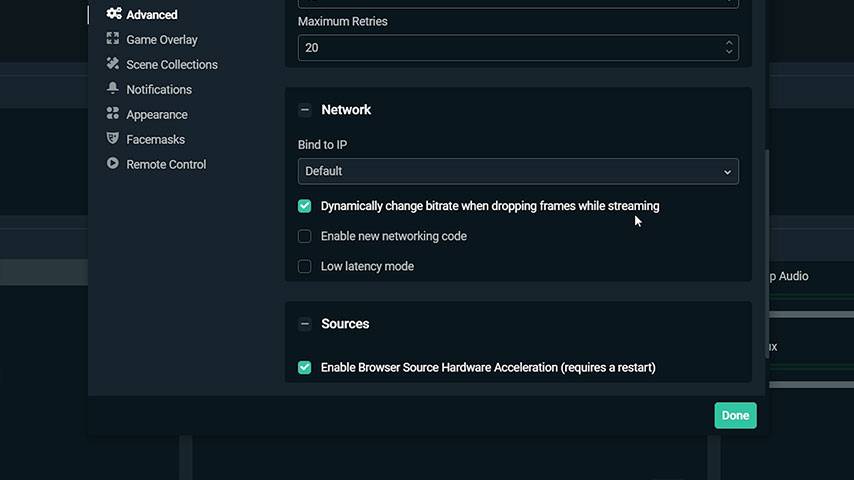
A dropped frame is basically when the stream can't keep up and starts skipping frames. You may have a nice 60 frame stream going, but now, those frames are being dropped little by little. If the software detects that, it will change your bitrate to keep up.
So this might take some of the sharpness away from the image, but the frame rate will stay high, which is what you want. To save your changes, go ahead and click ‘Done.'
Posting Your Live Stream to YouTube
Now you’re almost ready to click ‘Go Live’, but there's one more thing we need to do, and that's set it up on the YouTube end.
Setting up a live broadcast is a lot like setting up a regular video. You still need an engaging title, a great description, some keyword tags, and a powerful custom thumbnail.
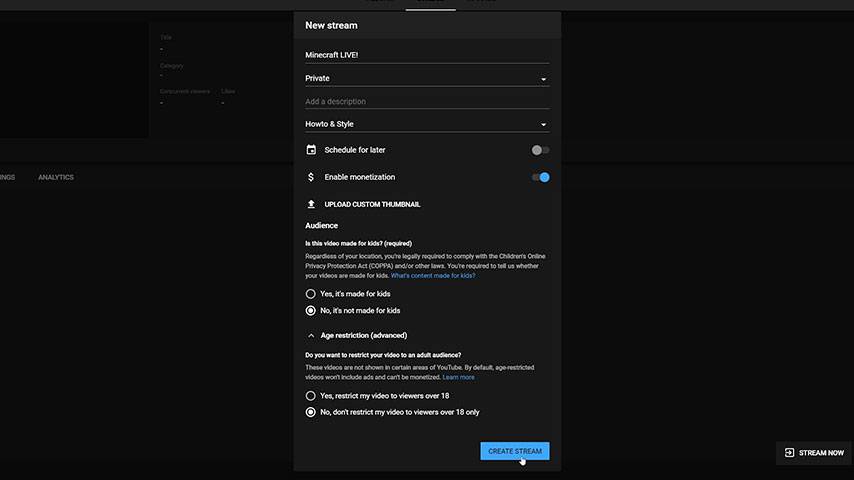
Head over to the YouTube Studio, click on ‘Create’, then in the drop-down menu hit ‘Go Live.’ If you've streamed before, you're going to get a prompt that tells you that you can copy all the settings, the thumbnail, the description, etc. from a previous stream, or you can go ahead and set up a new stream.
In my example, I’ve clicked on the ‘New Stream’ option so now I'm going to set up everything I need for the live stream, like the title and description.
You can also set your live stream to private, public, or unlisted, just like a normal video. If you want to make it private for a little while so you can tweak the description and other metadata, go ahead and do that. But if you want people to know that you're going to stream at some point, go ahead and make it public.
Now add a description, then add a title for your game, that's really important to help YouTube categorize you for that game.
Further down the Streamlabs OBS dashboard, there is an option to schedule for later. I would highly recommend doing this, as a live stream is an event, and you want people to know when it's going to happen. Scheduling for later will allow you to set the date and the time that you're going to go live, and everyone will know exactly when to come to your stream!
Next is the ability to upload your very own YouTube custom thumbnail. Having a great thumbnail is always crazy important, no matter whether it’s a video you’ve uploaded, or whether it’s a live stream. You want that thumbnail to be clickable because it’s an invitation to watch your content. If a viewer is intrigued, they will click through to your video.
Next on the dashboard is where you tell YouTube whether this live stream is ‘Made for Kids’ or not. You also have the option to impose restrictions on viewers because of their age. If you choose to restrict it to viewers that are 18 or over, YouTube users will get a notice that this live stream may not be appropriate for younger viewers.
If you’re happy with your title, description and custom thumbnail, and have completed all the details YouTube needs you to then you are ready to hit ‘Create Stream.’
Once you've created the stream, a new dashboard pops up while you're broadcasting live. It shows you all kinds of data, but what you really need to pay attention to is the information in the bottom left of the Streamlabs dashboard which is all about stream latency.
Basically, normal latency takes the broadcast and renders it for the audience. They're going to get a higher quality broadcast, but they're also going to see a higher delay based on when their chat message goes out and the time you read it. Viewers may pick up on that.
Choosing low-latency or ultra low-latency will cut down on that buffering time, but you risk your stream being lower quality.
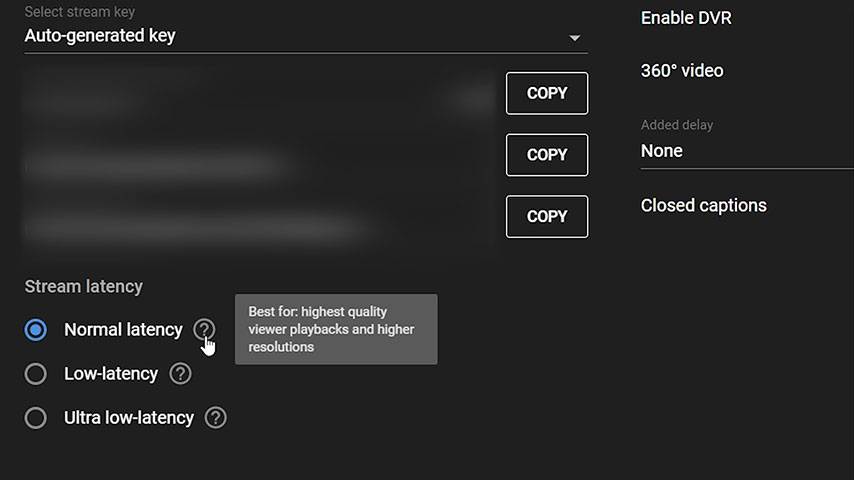
Because you've already logged into YouTube on Streamlabs, you shouldn't need to worry about this, but if you're using a different encoder, and not Streamlabs OBS, you will need to grab the stream key and paste it into your encoder on Streamlabs. (Of course, sharing your stream key will allow people to take over your channel and stream whatever they want on it, and you don't want that!)
After you’ve finished streaming, you can come back to the Streamlabs dashboard and check out the analytics, your viewer activity, and your stream health. You can basically check all the data insights that would you after uploading any video.
Stay tuned for more expert tips on live streaming on YouTube!
Want To Get More Views on YouTube?
If you want to take your YouTube channel to the next level and get more views on YouTube then make sure to download vidIQ. Join over 1 million other users and use vidIQ to help you research YouTube, analyze videos, audit your own channel, and take actionable steps click here to install now!
And if you’re really serious about growing your YouTube views and subscribers, sign up for exclusive access to the vidIQ Academy and learn how to launch a successful YouTube Channel in just 30 days.

