Lydia Sweatt is a writer who loves balancing her article/blog time indoors with a healthy dose of nature. She bikes, hikes, and identifies edible plants along the way.
How to Customize Your YouTube Channel
When viewers come to your YouTube channel, they need a quick summary of who you are and what they can learn from you. The faster they discover those things, the more likely they'll be to watch your content, engage with it, and subscribe to your channel.
The best way to make sure that happens is by customizing your YouTube channel homepage. There are many features to experiment with, and depending on how you organize them, you can take your channel from novice to pro YouTuber - at least visually. A YouTube channel with these five assets is in a better position to get more views and subscribers:
- An informative but simple channel banner
- A profile icon that looks good in a small, circular format
- A featured playlist(s) section to showcase your topics/niche
- A channel trailer that explains your content
- A featured channel(s) section
Visually, those are the things you need to set yourself apart from the competition.
Stop Guessing. Start Growing.
Join 20M+ creators using vidIQ to get more views, subscribers, and success on YouTube.
If you want to know how to set up these features, keep reading. We’ll walk you through the various steps of customizing your YouTube channel homepage - something every creator should learn how to do.
How to Find The YouTube Channel Customization Screen
Let’s start by customizing the layout of your YouTube channel homepage. You can make these changes and more in the YouTube Studio via the customization screen. Before you start tinkering with the settings, keep in mind that all changes affect your channel’s layout on both desktop and mobile.
Follow these steps to reach the customization screen:
- From most YouTube desktop screens, click on your profile image in the top right corner and go to the YouTube Studio.
- Go to the left menu panel and click ‘Customization’. Next, you should see a page that allows you to add a channel trailer, featured sections, featured channels, profile icon, channel banner, video watermark, an about section, channel links, and more.
Need a quick visual walkthrough? Watch our video tutorial about how to customize your YouTube channel:
The customization screen - and all the features mentioned above - is divided into three tabs. The layout tab helps you build the visual foundation of your channel. The branding tab is for adding specific styles, colors, and creating an overall design. And lastly, the basic info tab lets you add text and clickable links to your channel.
Be sure to hit ‘Publish’ in the top right corner of the screen when you’re finished editing. Otherwise, the changes won’t appear on your YouTube channel!
Adding a Trailer to Your YouTube Channel Homepage
Now that you’ve reached the customization screen, let’s take a look at the video spotlight feature. You can find it under the layout section, here:
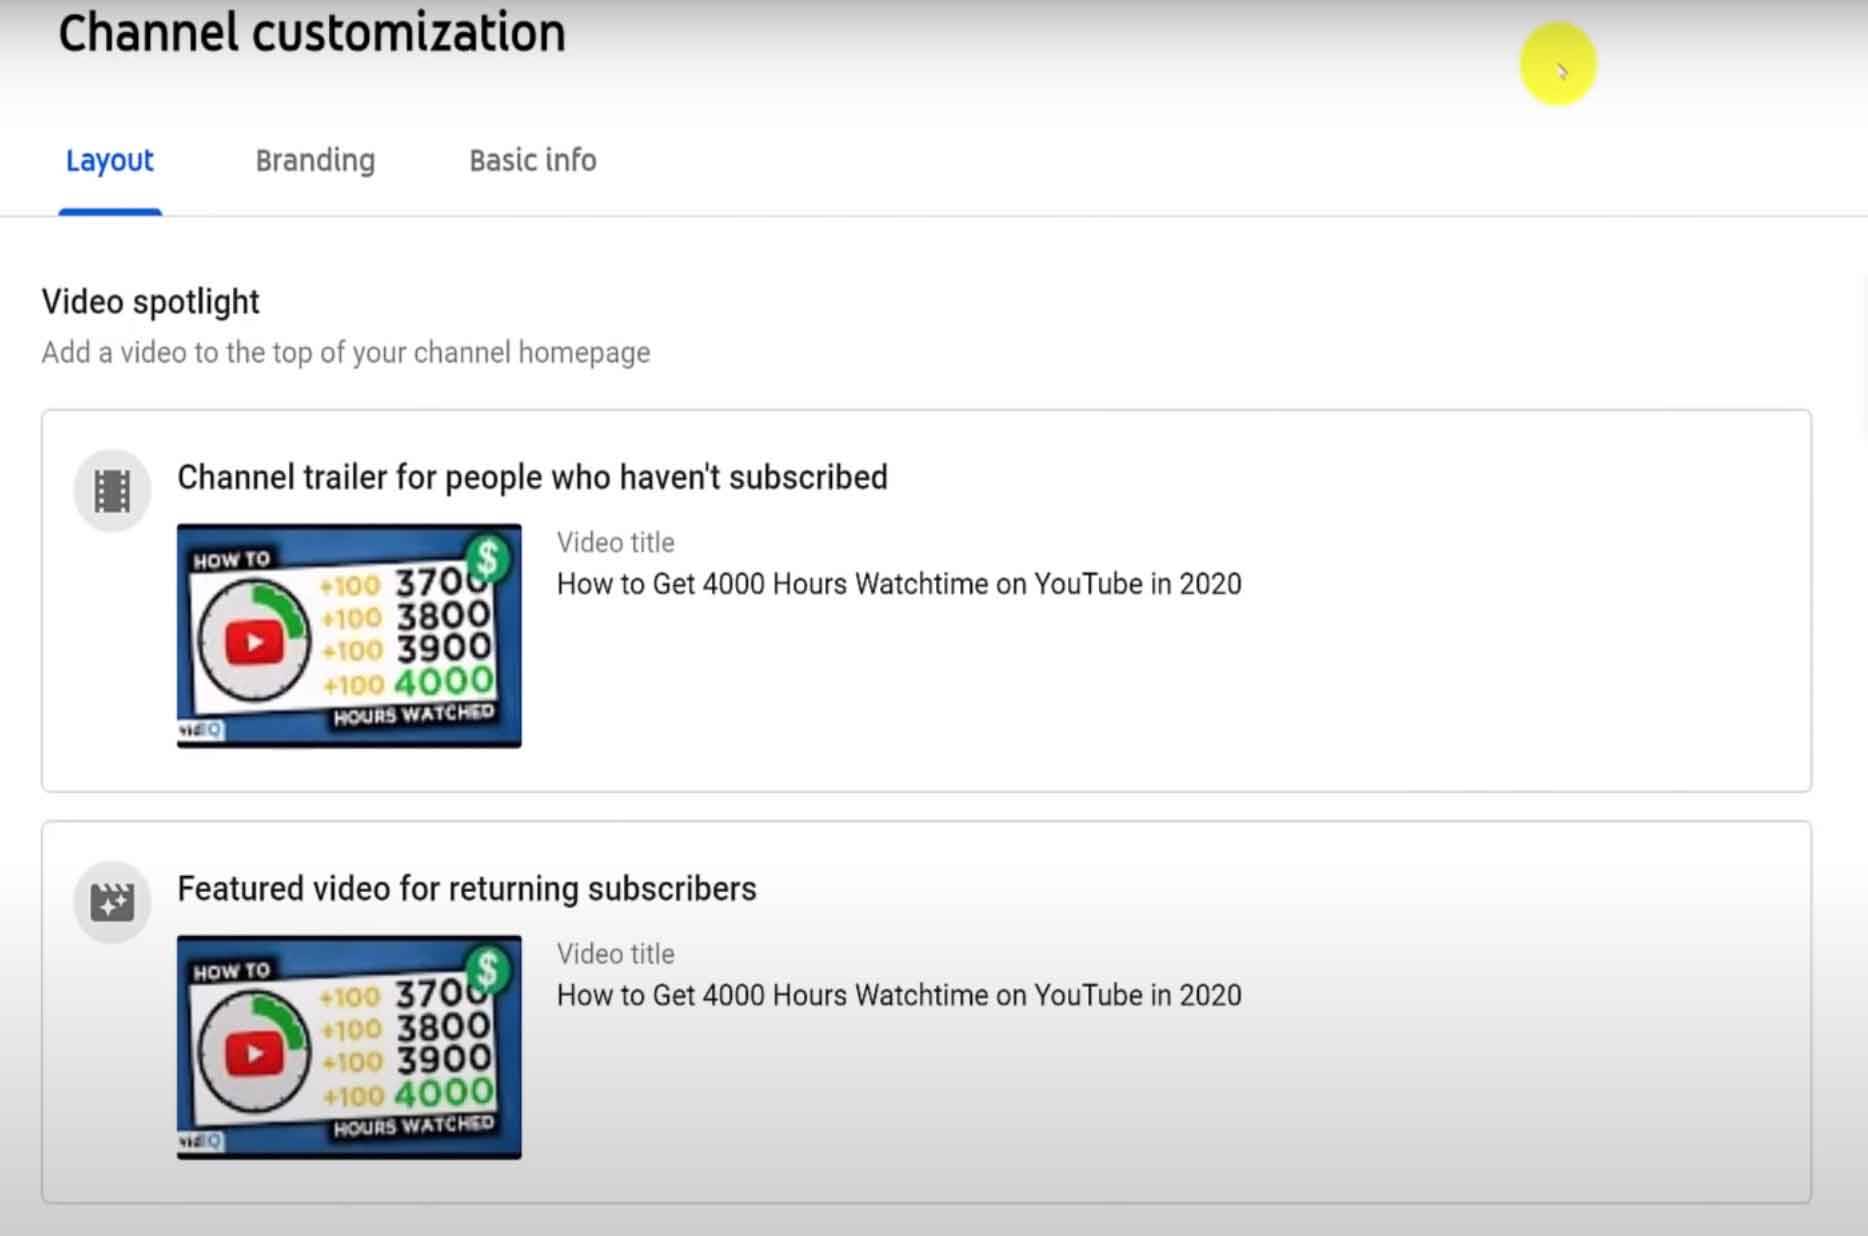
This screen lets you add a trailer to your channel, which is a video that introduces you and your content. It automatically plays when a viewer arrives on your channel, so it’s a good thing to have on your homepage.
If you want to show different trailers to specific viewers, YouTube has some convenient options. For example, you can show one trailer to non-subscribers and a different trailer to people who’ve already subscribed.
To change either of these settings, mouse over the appropriate box below ‘Video spotlight’ and click the three dots to either remove or change the trailer, like this:
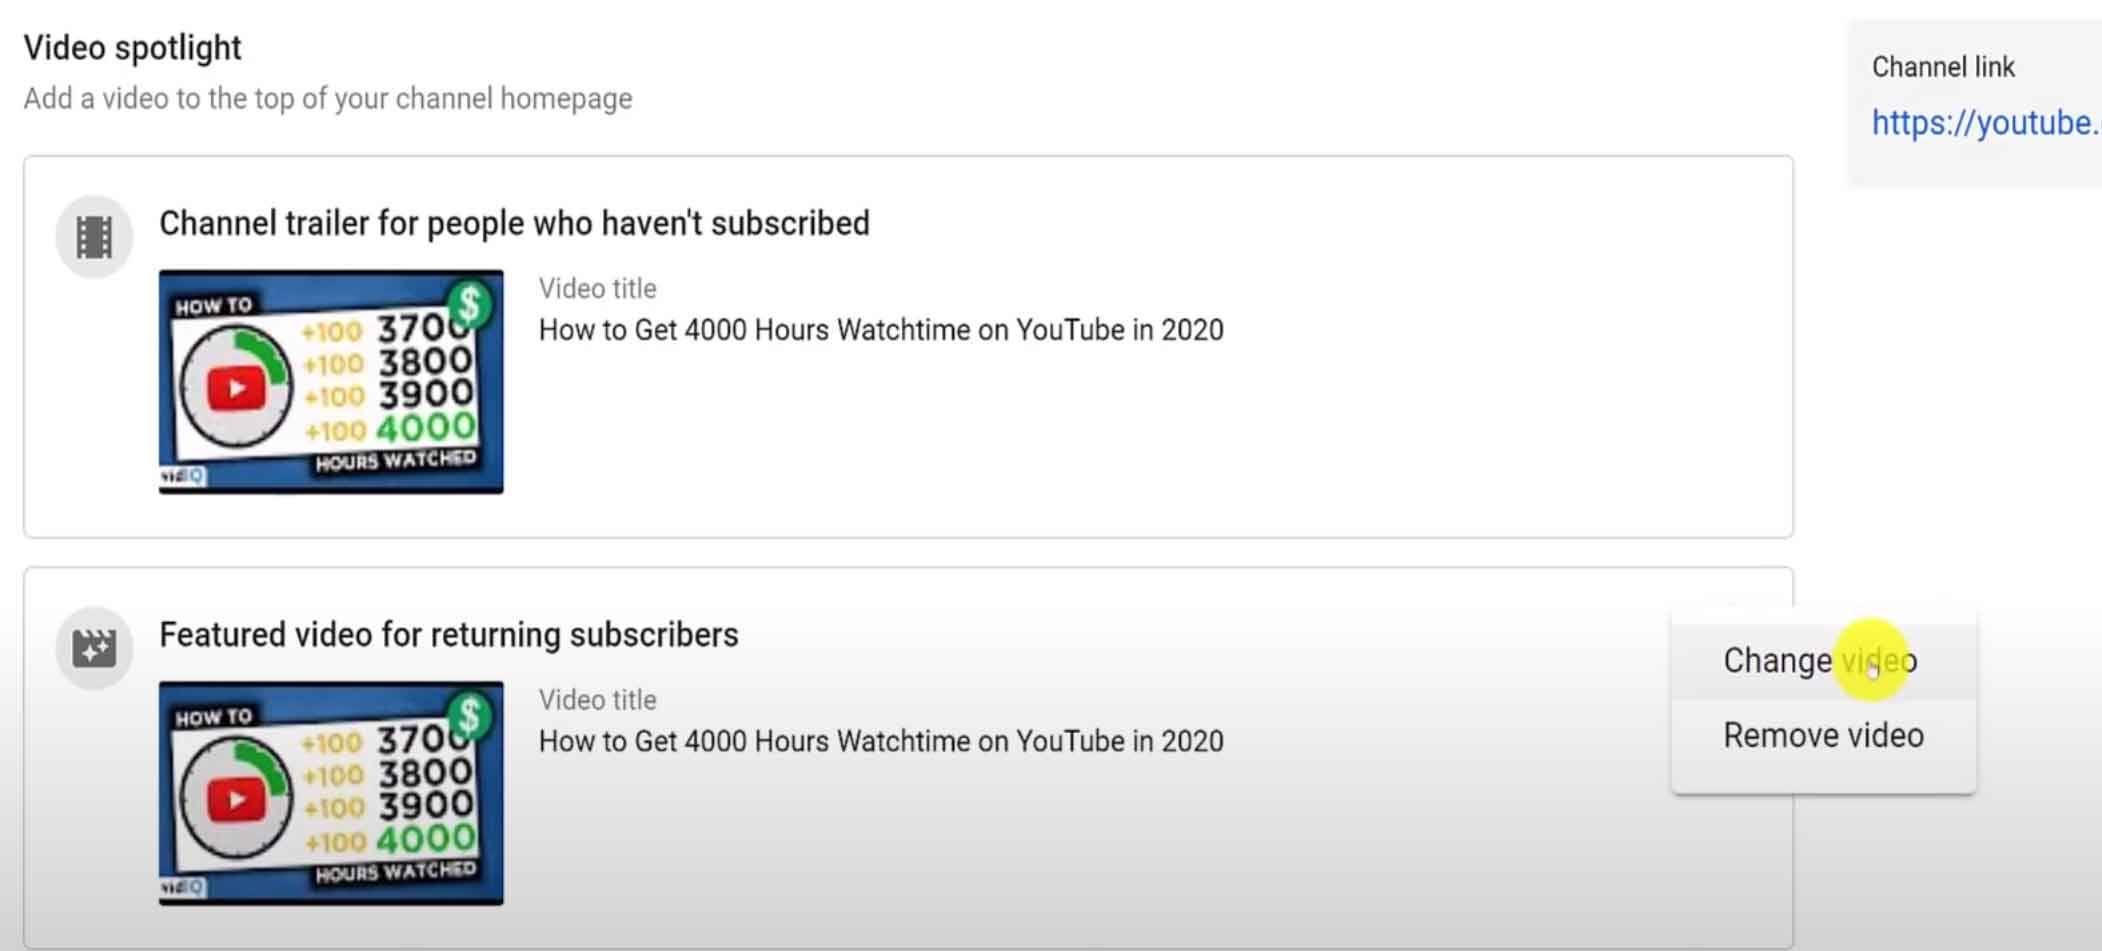
In the pop-up screen that appears, search your channel for the video you want to feature, select it, then publish the changes.
At this point, you may not have a suitable video for your channel trailer, and that’s OK. As soon as you’re ready, use these tips to create the best introductory video:
- Keep it brief. Aim to make your video no longer than 45 seconds.
- Include some B-roll of your best content as you introduce yourself.
- Tell viewers who your content is for and why they should watch.
- Inject as much personality into the video as you can.
How to Add, Edit, or Remove Featured Sections on YouTube
Below the video spotlight section is an area for featured content. When you want to quickly communicate your niche to viewers, you can add topic-based playlists or video collections to this section.
To start tinkering with this feature, return to the layout tab in the customization screen, then scroll down to ‘Feature sections’.
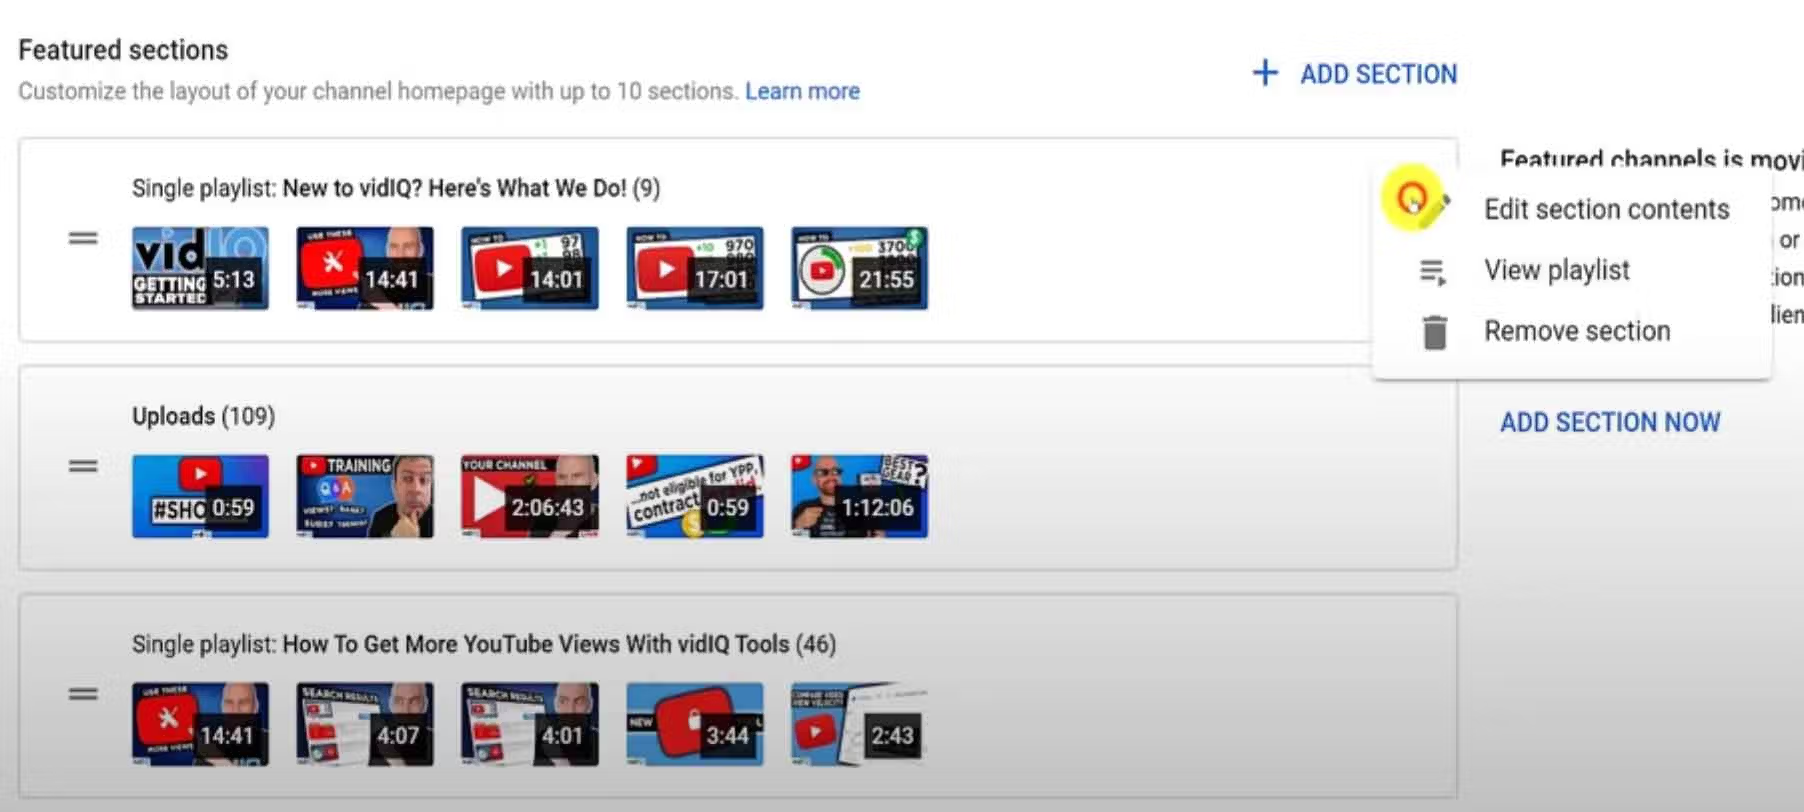
This will show you all the sections you’re currently displaying on your YouTube channel homepage. To reorder these, simply click and drag the three-lined icon next to any section up or down. To display a new section, go to the top right corner of the screen and click ‘Add Section’. A drop-down menu will appear with several featured content options, including recent uploads, popular uploads, live streams, and more.
For each section, you can click the three dots on the right to edit the content there. In some cases, it will allow you to change a playlist. But no matter what, you’ll always have the option to view or delete one, as shown below:
Want to create a featured section that encourages people to watch and subscribe? If so, keep these four important things in mind:
- You can add a maximum of 10 sections to your YouTube channel homepage. Create as many as possible to summarize your channel for new viewers.
- Create a playlist that shows viewers what type of content you make. On the vidIQ channel, our introductory playlist includes videos about how to get 1,000 subscribers and 4,000 hours of Watch Time on YouTube. That’s our niche!
- Create a recent uploads playlist. It’ll help new visitors understand that they’ve landed on an active, consistent channel.
- Write descriptions for your featured playlists. The text shows up in the featured section and adds more context to your video collections.
How to Customize YouTube’s Featured Channels Section [2021 Update]
Right now, the featured channels section appears on the right side of your YouTube channel homepage. It’s been there for years, but apparently, that’s going to change in 2021. Here’s the notification from YouTube explaining exactly what’s happening:
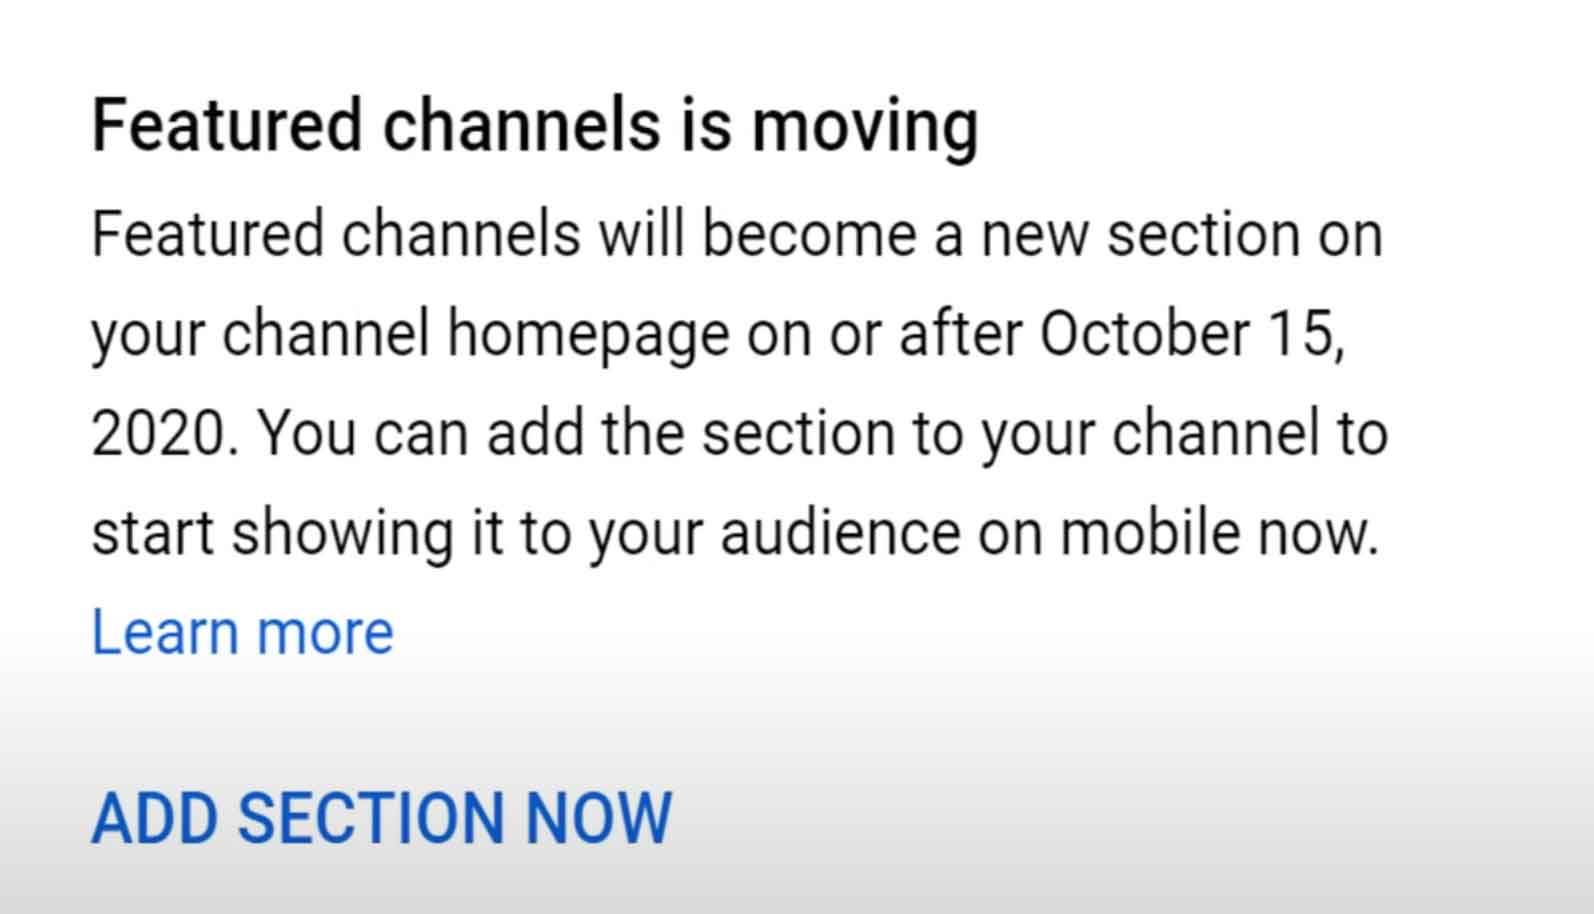
As you can see, YouTube is letting creators display featured channels in the same area as playlists and video collections. You can make the switch today if you want, so here’s how to make it happen:
- Click ‘Add Section Now”, as shown in the screenshot above.
- Next, a pop-up screen will appear. In the top right corner, type some brief, explanatory text that will become the title of your section.
- Navigate to the search bar and type the name of any YouTube channel. Select the one you want to make it appear in your featured channels section.
- Once you have a few channels in this section, you can click + drag each one to reorder the list. You can also remove channels from this section.
- Don’t forget to publish your changes.
When you’re done, here’s what the new section will look like:

How to Add a YouTube Profile Picture and Channel Banner
Next, let’s explore YouTube channel branding. To see all your options, click the branding tab on YouTube’s customization screen. You should see a variety of settings for adding logos to different parts of your channel, which helps you build a reputation on YouTube.
We’ll start with the first item on the list, the YouTube channel profile picture. Adding one is simple - all you need to do is click the ‘Change’ or ‘Remove’ buttons on the customization screen to add a new image. This is the same process for adding a channel banner, which we’ll explain very soon.
Beyond that, there are a few things to keep in mind about YouTube profile pictures. Although you’re uploading a square image, it will be displayed on YouTube as a circular image. That means you’ll have to crop your profile picture using YouTube’s uploader, so don’t put important information in the corner of the image.
There are even more things to consider with your channel banner. First, it needs to fit the dimensions of three media types: TV, desktop, and mobile. When you upload a banner image, YouTube will show you how it looks on different devices. If you need to, you can click and drag the corners of the image to resize it.
Another thing to consider is how visually complex the image is. It’s best to keep it simple and communicate what your channel is about with minimal text, plus some breathing room in your design. As a side note, you can change both images - the profile picture and channel banner - by going to your homepage, mousing over either one, and clicking the camera icon. This will redirect you back to the customization page in the YouTube Studio.
How to Add Watermarks to Your YouTube Videos
The next branding feature is video watermarks. Enable this setting on your channel, and a small square image will be added to the bottom-right corner of your videos. It’s great for displaying your logo or serving as a call-to-action, encouraging viewers to mouse over the image, and subscribe to your channel.
That's why we recommend adding a subscription-style image rather than a logo. As an added bonus, click here to download an image that works perfectly as a ‘subscribe now’ button. Use it as you please:
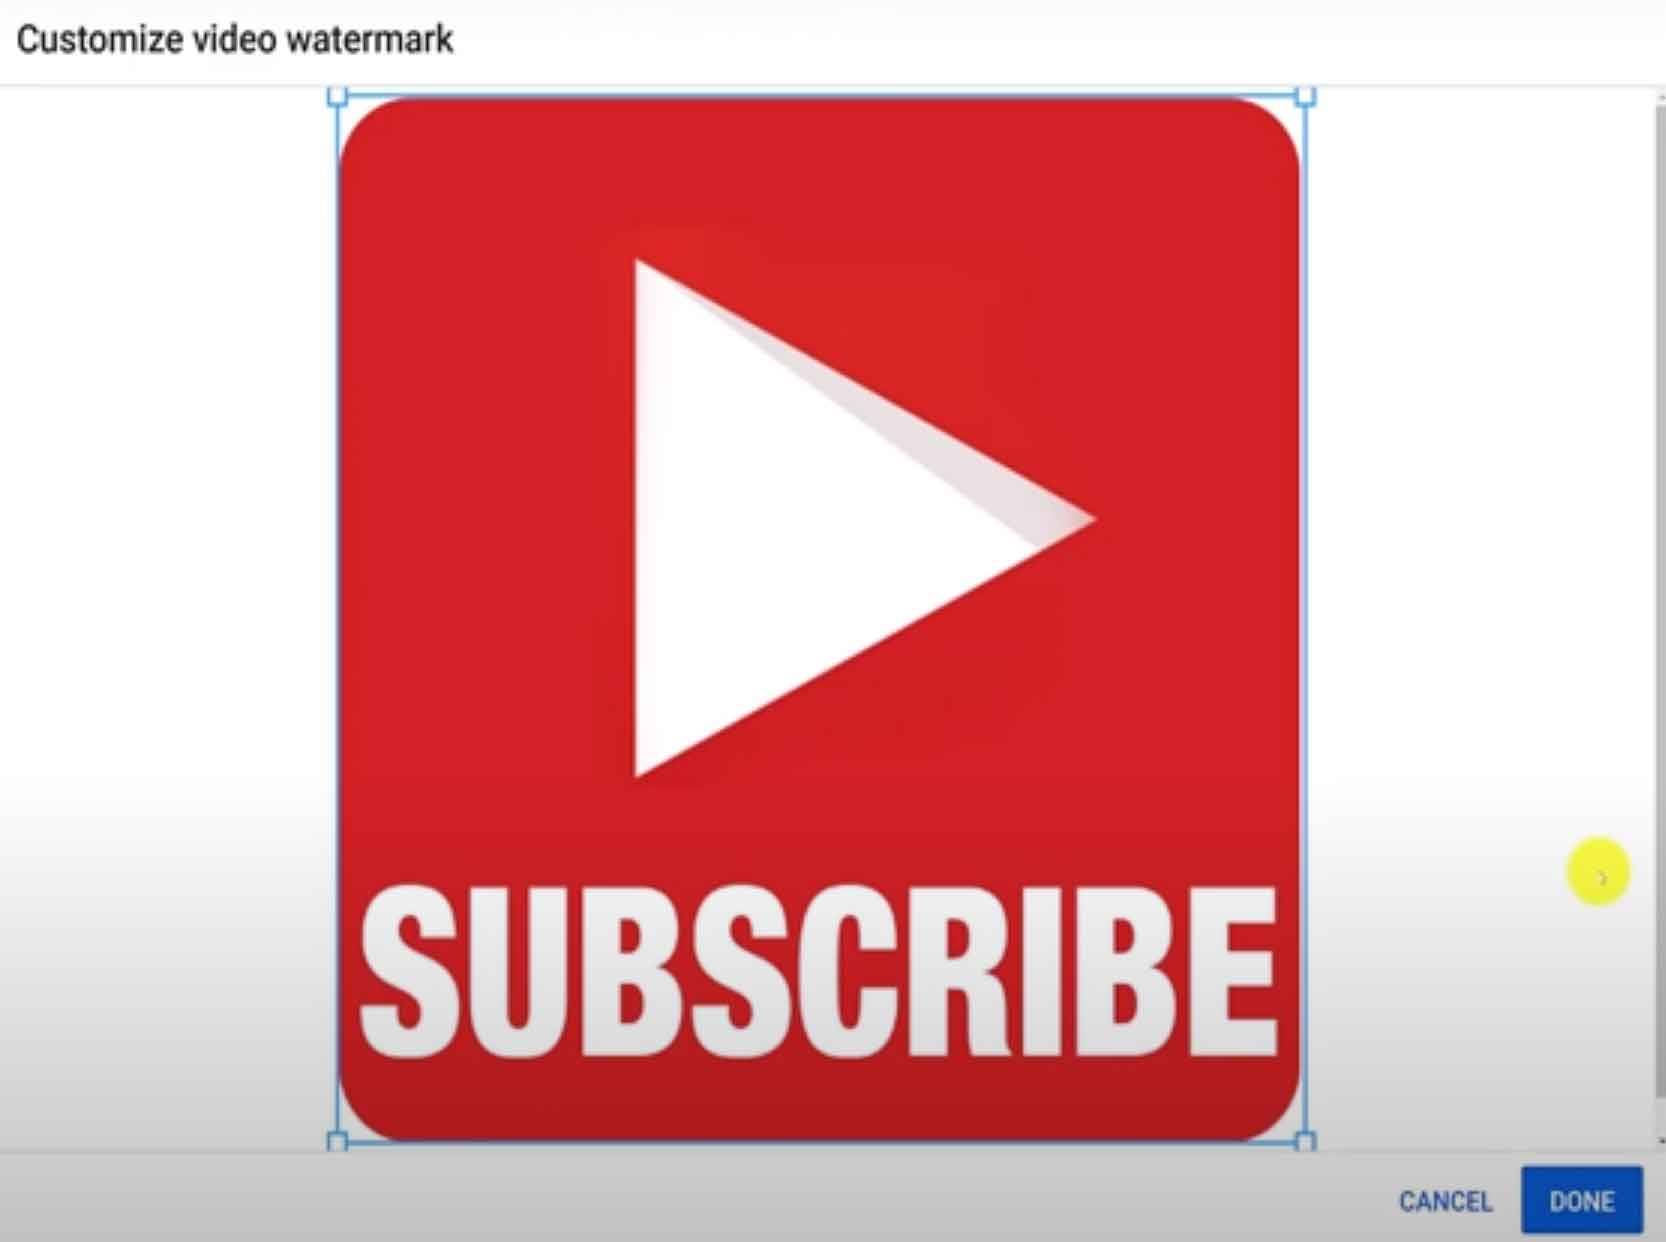
Adding a watermark to your videos is the same process as adding a profile picture or channel banner. While on the YouTube customization screen, click the branding tab, scroll to the watermark section, and click ‘Change’ or ‘Remove’.
Once you have your button, you can decide when (and how long) the watermark appears in your videos. We recommend having it visible the entire time, as that gives your viewers more opportunities to subscribe.
How to Change Your YouTube Channel Name
The basic information tab is our last stop when it comes to YouTube channel customization. For this section, we’ll start with something close to many creators' hearts: the name of your YouTube channel.
If your channel name is already the most epic thing ever, you might not need this section today. But if you ever want to change it in the future, the process is simple. While on the customization screen, click the branding tab then look below the ‘Channel name and description’ header. You should see your current channel name, as well as a pencil icon right beside it. Click that icon to type a new name, as shown below:
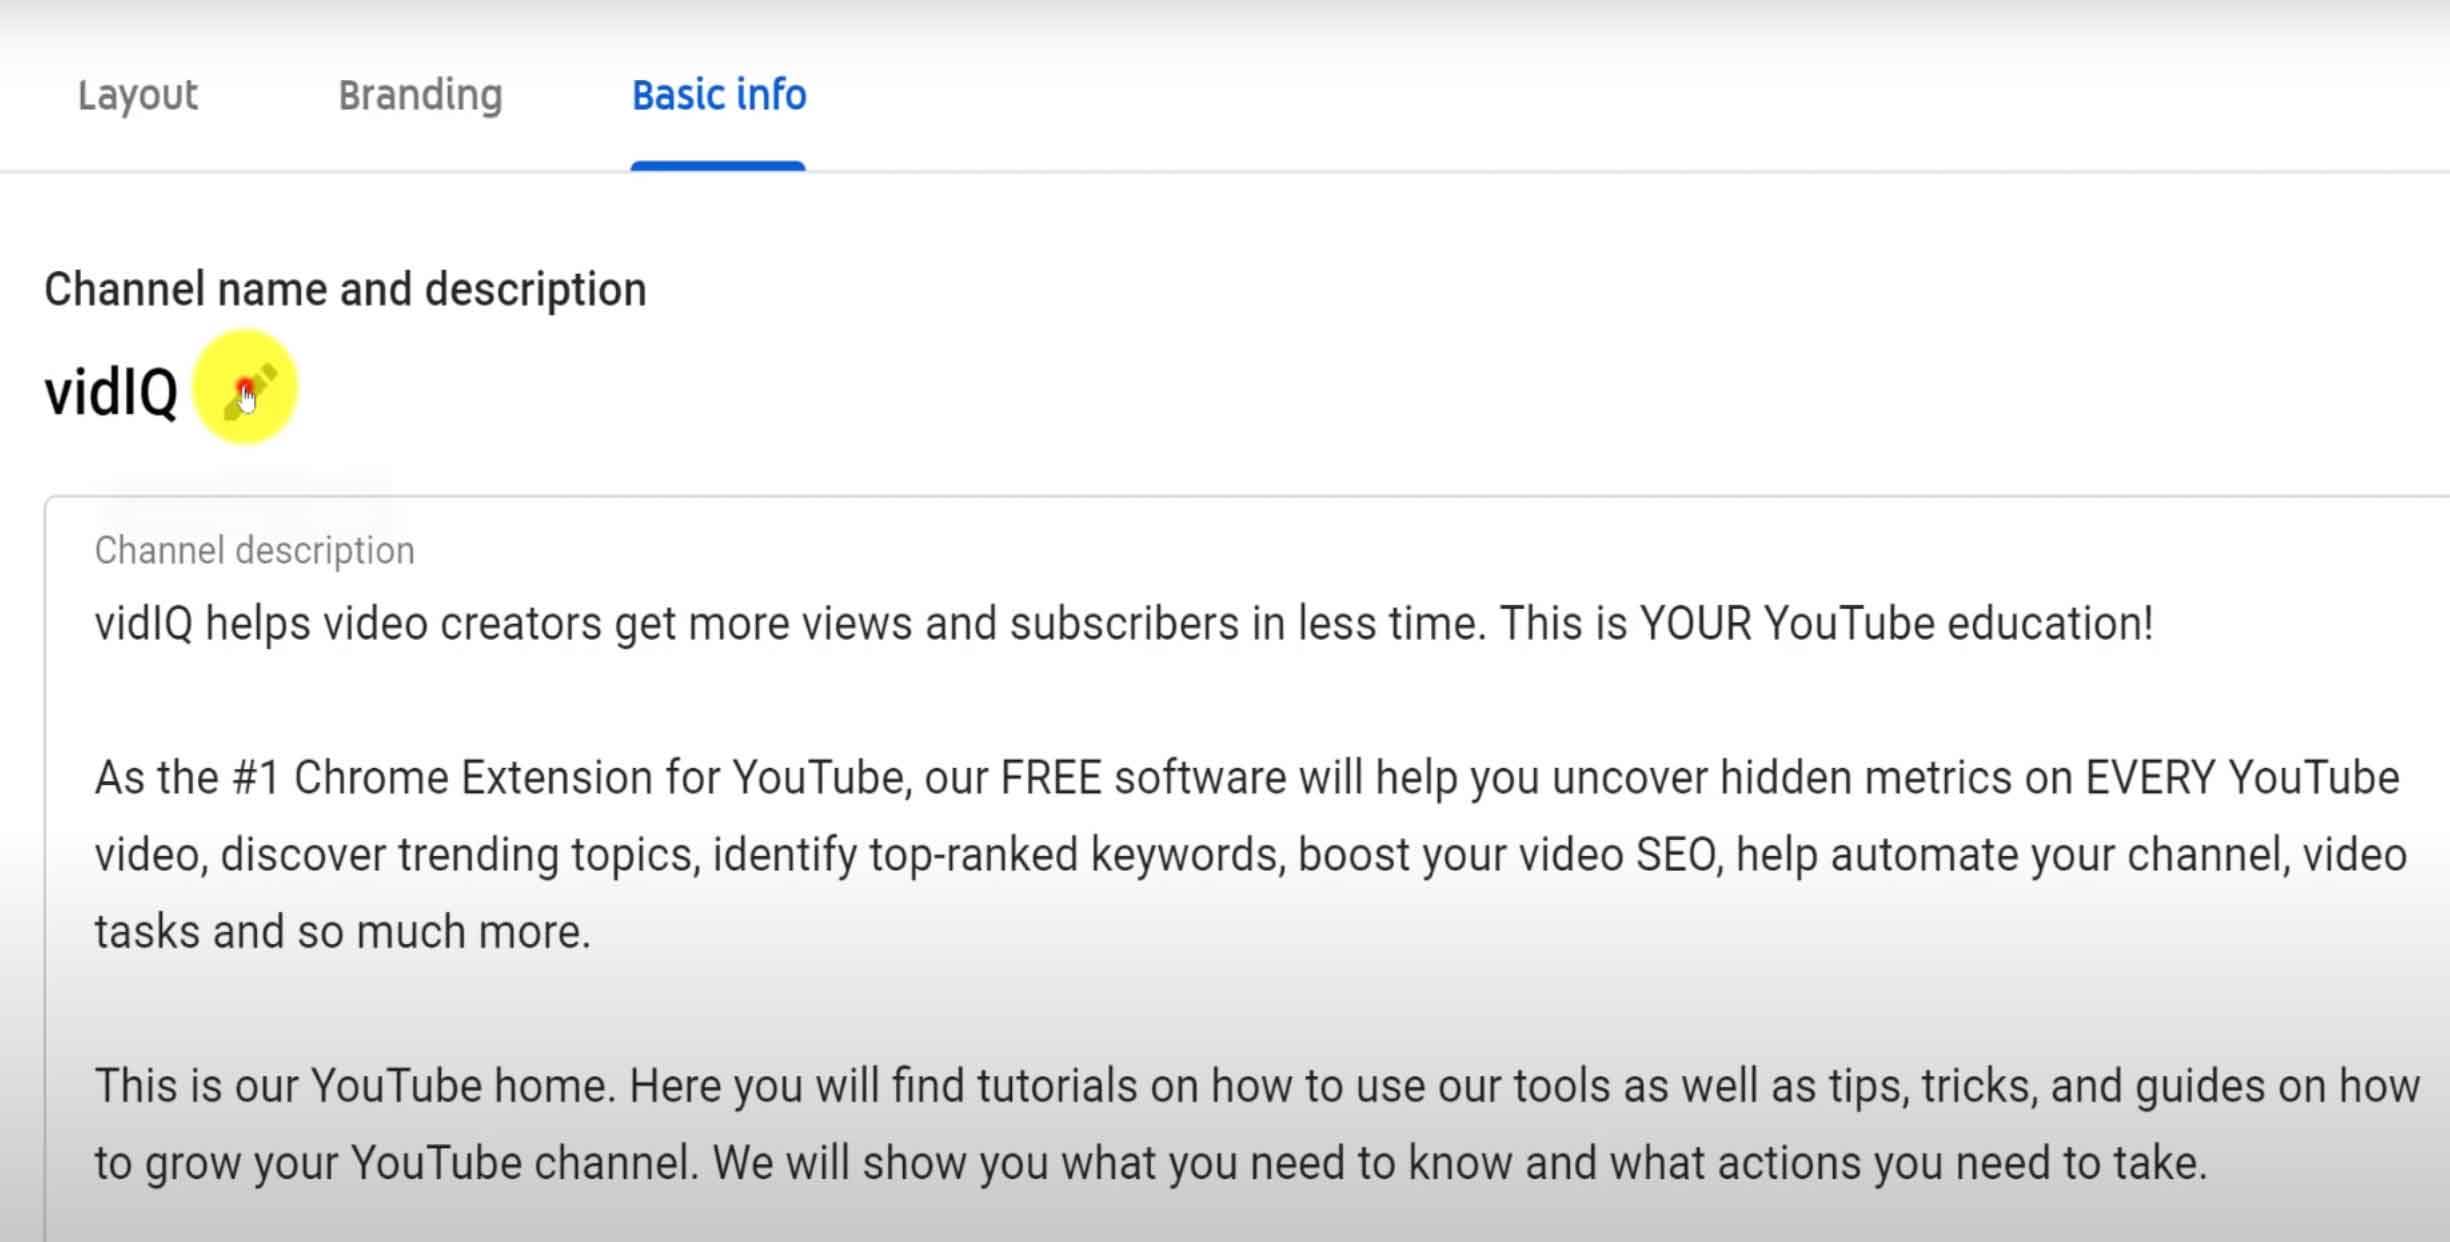
It’s easy to change your channel name, but you do have to bear in mind the impact it has on your Google accounts. If you have a personal YouTube account and you change your YouTube channel name, that can actually change your Google account name. However, if you have a brand YouTube account, changing the name of your channel doesn't impact your Google account.
We know that sounds really confusing. The topic requires more explaining than we can do here, so watch this video to get all the information you need:
How to Customize Your YouTube Channel’s ‘About’ Section
About a minute ago, while you were reading about YouTube channel names, you may have seen a screenshot showing vidIQ’s channel description. On the front end of YouTube, this is called the ‘About’ section. When viewers want more information about you and your content, they’ll head to this section to find the answers.
That’s why it’s important to speak directly to your target audience when writing your short bio. At the very least, you should:
- Explain the value people gain from watching your content.
- Include keywords related to your content.
When you’re finished writing your channel bio, go to the basic info tab and paste it in the text box below ‘Channel name and description’.
How to Add Links to Your YouTube Channel Banner
Did you know you can add a maximum of five links to your channel banner? You can use them to promote your website, social media profiles, online store, or other landing pages your audience might find useful.
No matter which links you decide to add, always remember that the first is super important. That’s because on desktop, only the first link includes text. Take a look at our channel banner links and how we draw attention to the most important one:

Underneath the basic info tab on the YouTube customization screen, you’ll see a header that reads ‘Links’. In this section, you can add, remove, and reorder the links in your channel banner as needed. These only appear on desktop; on mobile, links are buried deep in the about section.
How to Add a Contact Email to Your YouTube Channel
Want to collaborate with other creators? Collect inquiries from viewers? First, you’ll need to create and share an email address where people can reach you.
Here’s some advice for this section: Don't use your YouTube account email as your channel’s contact email. This might present a backdoor entrance for hackers. Instead, create a separate email for YouTube inquiries.
When you’re ready to add an email address to your channel, head to the basic info tab. Scroll down to the ‘Contact info’ header and paste your email into the text box.
We hope you find this guide useful! At vidIQ, it’s our mission to educate you on your YouTube journey as you pursue a successful video-making career. If you want more content like this, be sure to subscribe to the vidIQ YouTube channel.
Want to Get the Most Out of YouTube?
If you want to take your YouTube channel to the next level and get more views on YouTube then make sure to download vidIQ. Join over 1 million other users and use vidIQ to help you research YouTube, analyze videos, audit your own channel, and take actionable steps to succeed.
And if you’re really serious about growing your YouTube views and subscribers, sign up for exclusive access to the vidIQ Academy and learn how to launch a successful YouTube Channel.
20k+ 5 Star Reviews
Ready to put this into action?
Use vidIQ to find your next video idea, pick better keywords, and optimize every upload.

